
Before a catch basin is installed, it is important to step back and ask a simple but often overlooked question, what purpose is it actually going to serve at this location? Catch basins are frequently installed out of habit or because “there has always been one there,” rather than because they are the correct solution for the drainage need.
A catch basin is designed to do two primary things. First, it provides a collection point for surface runoff, allowing water to enter the stormwater system in a controlled manner. Second, and just as important, it acts as a sediment trap. The sump at the bottom of the basin is intended to capture sand, grit, and debris before those materials can travel downstream and clog pipes, outfalls, or natural waterways.
Because of this dual function, a catch basin is most appropriate in locations where water needs to be intercepted and where sediment or debris is expected to be present. Common examples include low points along roadways, the edges of parking lots, and areas downstream of unpaved surfaces where sediment transport is likely. In these situations, the basin not only manages water, but also protects the rest of the drainage system.
However, not every drainage situation calls for a catch basin. If the goal is simply to move water efficiently from one point to another with minimal debris, a structure such as a manhole or a simple junction box may be more appropriate. Installing a catch basin where no sediment is expected can create unnecessary maintenance obligations, as the sump will still accumulate whatever material does enter and will require periodic cleaning.
It is also important to consider placement. A catch basin installed at a high point, or in an area where water does not naturally concentrate, will do little to intercept runoff. Likewise, placing a basin in a location that is difficult to access for cleaning can turn a useful asset into a long-term liability.
In short, a catch basin should be installed where it can effectively collect water and capture debris. If it cannot reasonably accomplish both of those functions, it is worth reconsidering whether it belongs there at all.
Before any excavation begins, the success of a catch basin installation is largely determined by how well the site is understood. What lies beneath the surface will dictate not only how easy the installation will be, but whether it is feasible at all. Too many projects run into trouble because crews begin digging with a general idea of the work, rather than a clear and verified understanding of subsurface conditions.
Start by confirming that a complete and functional drainage path can actually be constructed. A catch basin that cannot be connected to a suitable outlet is of no use. Whether the discharge point is an existing storm line, a ditch, a culvert, or a defined outfall, the entire route between the basin and that endpoint must be considered. This includes verifying that proper slope can be achieved and maintained throughout the run. If the pipe cannot be installed at a consistent grade, the system will not perform as intended.
Equally important is understanding what exists below ground. Soil conditions can vary dramatically even within short distances. Some areas may excavate easily, while others may contain dense clay, large cobbles, or shallow bedrock. If there is a known history of encountering rock in the area, that should immediately factor into planning, as it may require specialized equipment, additional time, or even a redesign of the system. Groundwater is another consideration, as high water tables can complicate excavation and bedding preparation.
Existing utilities present one of the most critical risks. Water lines, sanitary sewers, gas mains, electric, telecommunications, and other buried infrastructure are often present in the same corridors where drainage improvements are needed. Many of these utilities cannot be moved easily, if at all, and striking one can result in serious safety hazards, service disruptions, and significant liability. Even when utility locations are shown on plans, they should never be assumed to be exact.
For this reason, contacting 811, or your regional underground utility locating service, is not optional, it is mandatory. This step must be completed before any digging begins. Utility locators will mark the approximate locations of buried services, giving crews the information needed to avoid conflicts and plan accordingly. In some cases, hand digging or vacuum excavation may be required to safely expose and verify utility depths before proceeding.
Proper investigation and planning reduce uncertainty. They allow adjustments to be made before equipment is mobilized and trenches are opened. Taking the time to understand the ground, confirm a viable outlet, and identify potential conflicts will prevent delays, reduce risk, and ensure that the catch basin installation proceeds as intended.
Another often overlooked obstacle is the presence of mature trees along the proposed drainage path. Tree roots can extend well beyond the visible canopy, and trenching through these root zones frequently requires cutting major structural roots. When large sections of root are removed, the tree is often destabilized or begins to decline, sometimes dying within a year of the installation. This creates more than just an aesthetic issue. Homeowners who purchased properties with established trees are rarely pleased to see them damaged or lost, and their frustration will quickly be directed at the municipality or contractor responsible. Even more concerning, a compromised tree can become a safety hazard, shedding large branches or failing entirely, which introduces potential liability. Whenever mature trees are present, their root systems should be treated as a critical constraint, and alternative alignments or methods should be considered to avoid long-term consequences.
Getting the elevation right is one of the most critical parts of a catch basin installation, and one of the most common places where mistakes occur. Every component of the structure and its connecting pipes must work together vertically, and small miscalculations can quickly compound into major problems in the field.
Start by establishing the required invert elevations for both incoming and outgoing pipes. These elevations must support proper slope throughout the system so that water flows efficiently without standing or backing up. The outlet pipe elevation is especially important, as it ultimately controls how low the basin must sit. From there, work backward to ensure that any incoming pipes can enter the structure at appropriate heights while maintaining their required pitch.
The dimensions of the catch basin itself must also be considered. Precast structures come in fixed heights, and while some flexibility exists, it is not unlimited. Many basins include designated knockouts for pipe penetrations, and these are often located at specific elevations on the structure walls. If you are relying on those knockouts, your pipe elevations must align with them. If coring is required instead, you may gain some flexibility, but you are still constrained by the structural limits of the basin and the need to maintain proper clearances.
Above the structure, the frame and grate or access cover add additional height that must be accounted for. The top of the grate is typically set to match the finished grade, whether that is pavement, gravel, or lawn. This means the total structure height, from the bottom of the basin to the top of the frame, must be carefully calculated in advance.
Below the basin, the stone foundation plays an equally important role. A typical installation includes 6 to 12 inches of compacted gravel to provide a stable base and proper drainage. This thickness must be included in your elevation calculations, not treated as an afterthought once excavation begins.
Accuracy during excavation is essential. If the hole is dug too shallow, the basin will sit too high, and the only correction is to remove it and excavate further, which is time-consuming and inefficient. If the excavation is too deep, there is more flexibility, as precast concrete risers and adjustment rings are available in various thicknesses to bring the frame and grate up to the correct final elevation. However, relying too heavily on adjustments can create a less stable structure and should not replace careful planning.
In the end, determining elevation is about thinking through the entire vertical profile of the installation before any digging begins. When pipe slopes, structure dimensions, base material, and finished grade are all accounted for, the installation proceeds smoothly. When they are not, corrections in the field become costly and frustrating.
This is the point where all of the planning either proves itself or begins to fall apart. Excavation is not just digging a hole, it is executing the exact depths, slopes, and alignments that were determined ahead of time. The basin excavation should be carried down to the planned subgrade, including the thickness of the stone foundation, while trenches for all incoming and outgoing pipes must be cut to the correct elevations and grades so everything ties together properly.
As excavation begins, constant awareness of utilities is critical. Marked utilities should be clearly identified and respected, and excavation around them should proceed with appropriate caution, often requiring slower work or hand digging as you approach conflict areas. However, one of the most important realities to keep in mind is that not every utility is always marked. Unrecorded lines, abandoned services, or improperly documented installations are encountered far more often than they should be. Assuming that markings are complete and perfectly accurate is a mistake that can lead to costly or dangerous outcomes.
At the same time, it is easy to become so focused on what is below ground that hazards above ground are overlooked. Excavators, especially when swinging or repositioning, can easily come into contact with overhead utilities such as electric lines, communication cables, or even nearby structures and tree limbs. These strikes can be just as dangerous as hitting something underground. Maintaining situational awareness in all directions, not just in the trench, is essential throughout the excavation process.
A well-executed excavation sets the tone for the rest of the installation. When depths are accurate, trenches are properly graded, and hazards are accounted for both above and below ground, the remainder of the work becomes far more straightforward. When excavation is rushed or assumptions are made, problems tend to surface quickly and compound from there.
Excavation work demands constant attention to safety, especially when heavy equipment is in operation. Ground personnel must remain clearly visible to the excavator operator at all times and stay well outside the swing radius and reach of the machine. No one should ever be in the trench while active excavation is taking place, as conditions can change instantly and without warning.
It is also important to limit excavation to what can be properly secured the same day. Any area that cannot be protected or backfilled before leaving the site should not be opened. Trenches and open excavations left unattended overnight present serious hazards to both vehicles and pedestrians, particularly in roadside or residential areas. Proper planning and restraint are key, keeping the work zone safe not just during operations, but after crews have left for the day.
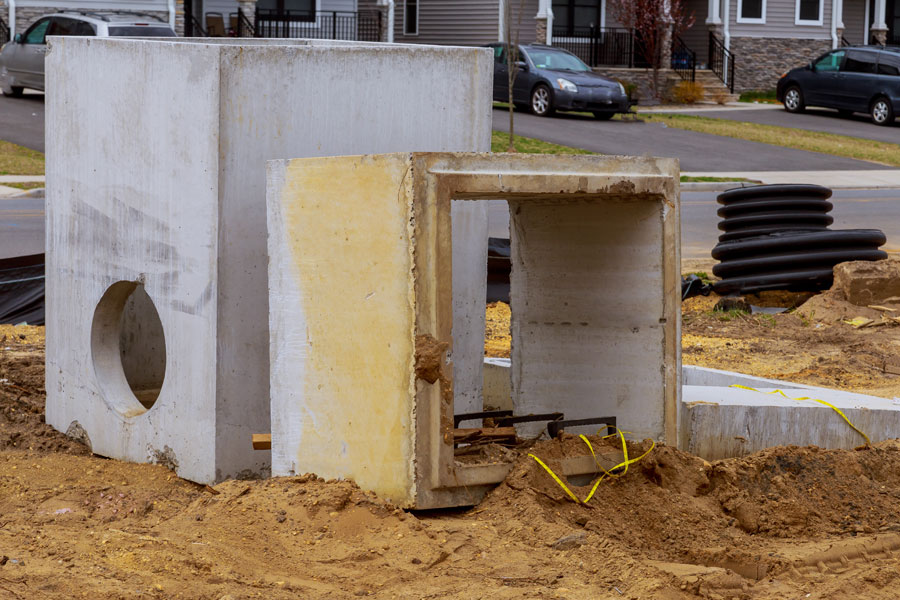
Proper preparation of the catch basin before it is set in place can save a significant amount of time and reduce risk in the field. One of the most important steps is creating the pipe penetrations while the structure is still above ground. Whether you are removing knockouts or coring holes, this work is far easier, more accurate, and significantly safer when performed at ground level rather than down in a trench. Trying to cut penetrations after the basin is installed often leads to awkward positioning, reduced visibility, and increased risk to both workers and the structure itself.
At the same time, attention must be given to preparing a solid and uniform foundation. The bottom of the excavation should be brought to the correct subgrade and then lined with 6 to 12 inches of clean, compacted stone. This base must be leveled and properly tamped to provide full support for the structure. An uneven or poorly compacted foundation can lead to settling, shifting, or misalignment, all of which will compromise the performance of the basin and any connected pipes.
Safety during this phase is just as important as accuracy. Depending on the depth of the excavation and the stability of the surrounding soils, a trench box or other appropriate protective system should be used. Excavation walls can become unstable without warning, and working within an unprotected trench introduces unnecessary risk. Preparing both the structure and the excavation correctly ensures that when the basin is finally set, it rests on a stable base and is ready for efficient, safe installation.
With the excavation prepared and the stone base properly leveled and compacted, the catch basin is ready to be set in place. This step requires careful coordination and attention to safety, as precast concrete structures are heavy, awkward to handle, and easily damaged if not lifted correctly.
The basin should be lifted using appropriate rigging connected to designated lifting points, if provided by the manufacturer. The use of a spreader bar is strongly recommended, as it helps distribute the load evenly and keeps lifting chains or straps from bearing directly against the walls of the structure. Without a spreader bar, inward pressure from rigging can crack or weaken the basin, especially on larger units. A properly sized spreader bar not only protects the structure, but also improves stability during the lift.
As the basin is lowered into the excavation, it should be guided slowly and carefully into position. Ground personnel should remain visible to the operator at all times and stay clear of pinch points and suspended loads. No one should ever place themselves beneath the structure while it is being lowered. Minor adjustments can be made as the basin approaches the stone foundation to ensure it is aligned correctly with incoming and outgoing pipe trenches.
Once set, the basin should sit firmly and evenly on the prepared stone base. It is important to verify that it is level in all directions, as any tilt can affect pipe connections and the final grate elevation. If adjustments are needed, the basin may need to be lifted and the stone base reworked rather than attempting to force it into position.
A careful and controlled installation at this stage sets the foundation, both literally and figuratively, for the remainder of the work. When the basin is properly supported, level, and undamaged, subsequent steps such as pipe connections and final grading become much more straightforward.
With the basin set and aligned, the next step is making the pipe connections, which is one of the most critical points in the entire installation. Even if everything else is done correctly, a poor connection at the basin wall can lead to long-term failure.
Before installing the pipes, the trench bottom should be properly shaped and the sloped bedding material should be firmly tamped in place. This ensures the pipe is supported evenly along its entire length and maintains the intended grade. Skipping this step can lead to uneven settlement, deflection, or low spots that will negatively impact flow and long-term performance.
There are several common methods for sealing pipes where they enter and exit the structure. Traditional installations often rely on a mortared connection, where the annular space between the pipe and the wall penetration is packed and sealed with mortar or grout. When done properly, this can provide a solid and durable connection, but it requires care, proper materials, and good workmanship to ensure there are no gaps or weak points.
More modern installations frequently use rubber boots or flexible connectors. These are designed to create a watertight seal while also allowing for slight movement between the pipe and the structure. This flexibility can be especially valuable in areas subject to settlement, frost movement, or vibration from traffic. Many precast basins are manufactured to accommodate these boots directly, making installation more consistent and reliable.
Regardless of the method used, achieving a tight, secure seal is essential. Any voids or leaks at the connection point allow water to move outside the pipe system and into the surrounding soil. Over time, this can wash away supporting material, leading to voids beneath the surface. What begins as a small leak can gradually develop into significant underground erosion, and eventually a visible sinkhole adjacent to the basin.
For this reason, pipe connections should never be rushed or treated as a minor detail. Each connection should be carefully inspected during installation to confirm that it is fully sealed and properly supported. Taking the time to get this step right will prevent costly repairs and safety hazards down the road.
The final structural step is installing the top of the catch basin, whether that is a direct-mounted frame and grate or a concrete cover with an access opening. Smaller precast basins often allow a metal frame and grate to be set directly on the structure, while larger basins or vaults typically require a concrete slab cover with a formed opening to accept a steel frame. In either case, the components must be set to the correct final elevation so the grate or cover matches the surrounding finished grade. The frame should be properly seated, leveled, and secured, often with mortar or adjustment rings as needed to achieve a tight, stable fit. Care should be taken to ensure the cover is fully supported and does not rock or shift, as improper seating can lead to noise, movement under traffic, or long-term structural issues.
Before any backfilling begins, the system should be tested to confirm that all connections are watertight. This is the last opportunity to identify and correct issues while everything is still exposed and accessible. Once the basin and pipes are buried, even a small leak can go unnoticed until it develops into a much larger problem.
Water should be introduced into the system and allowed to flow through the basin and connected pipes while all joints and penetrations are closely observed. A standard garden hose can be used for this purpose if necessary, although it requires patience to generate enough flow to meaningfully test the system. If a water truck is available, it provides a much higher volume of water and a more realistic simulation of actual storm conditions, making it a far more effective test.
During testing, look for any signs of leakage around pipe connections, penetrations, or joints. Even minor seepage should be addressed immediately. A connection that leaks under controlled conditions will only worsen over time once subjected to real flows and changing ground conditions. Verifying watertightness before backfilling helps ensure the long-term integrity of the installation and prevents future erosion, settlement, and costly repairs.
This step also serves as the final confirmation that the system actually functions as intended. By introducing water and observing its movement, you can verify that it flows freely through the pipes and reaches the planned outlet without restriction or backup. If water does not make it to the endpoint as expected, it is far easier to diagnose and correct the issue now than after the system has been backfilled and put into service.
Once the system has been tested and confirmed to be watertight and functioning properly, backfilling can begin. This step is just as important as any other part of the installation, as improper backfilling can undo otherwise solid work by allowing settlement, pipe movement, or structural stress on the basin.
Backfill should be placed in controlled lifts and compacted as it is installed. Simply pushing material back into the excavation without proper compaction will almost always lead to future settling. Particular attention should be given to the areas around the pipe connections and along the sides of the basin, where voids are most likely to form. These areas should be carefully filled and compacted to ensure uniform support.
Material selection also matters. Clean, suitable fill that can be properly compacted should be used, especially in the immediate vicinity of the structure and pipes. Large rocks, frozen material, or debris should be kept out of the backfill, as they can create pressure points or voids that compromise the installation over time.
As backfilling progresses, care should be taken not to shift the basin or disturb the pipe alignments. Equipment should operate in a controlled manner, and excessive force against the structure should be avoided. Bringing the fill up evenly around the basin helps maintain its position and stability.
When done correctly, backfilling locks the entire system into place, providing the support it needs to perform reliably for years. When done poorly, it often leads to settlement, surface depressions, and repeated maintenance issues that could have been avoided with proper technique.
With the installation complete, attention should shift to stabilizing the disturbed area and ensuring the system continues to perform as intended over time. Any exposed soil should be seeded as soon as possible, either through traditional dry seeding or hydroseeding, to promote vegetation growth and reduce the risk of erosion. On steeper slopes or areas prone to washout, anti-erosion mats, blankets, or erosion control bags should be installed to hold soil in place while vegetation becomes established.
The site should be monitored regularly in the weeks and months following installation. Watch for signs that vegetation is taking hold, as well as any areas where soil is washing away or failing to stabilize. Just as important is keeping an eye out for depressions or sinkholes forming near the basin or along the pipe path, which can indicate leaks or voids developing underground. Early detection allows for corrective action before the problem worsens.
Ongoing maintenance of the catch basin itself is also essential. The sump is designed to collect sediment and debris, but if it is not cleaned out periodically, that material will eventually fill the basin and begin to move downstream. At a minimum, catch basins should be inspected and cleaned once per year, with more frequent maintenance in areas that experience heavy runoff, sanding, or debris accumulation. Consistent observation and maintenance ensure the system continues to function properly and protect surrounding infrastructure.